I was thinking of something to blog about, so I was doing a little research on Carnival: People. "Carnival people" you ask. Yes, carnival people.
The britannica.com quotes this about Carnival: People.
"Carnival barkers, operators, and performers may seem like romantic people to youngsters, but many "carnies" are shrewd businessmen. They survey the financial condition of a community before renting the lot or posting the colorful show bills. They may obtain the sponsorship of local churches or charitable groups to gain goodwill and draw crowds".
See last week I had a couple come into my store to buy some jewelry supplies as they make feathered earrings and sell them in their travels, both of them were very toned, lets just say his arms were bulging and if he would not have been wearing a tank the arms on his shirt would have just ripped apart. As we were talking to each other he said they were not from here but from Salt lake city, just here visiting family in between stops. He said they were "Carnies", I right away think of your local fair slash parking lot carnivals that you see all the time, but that was not the case with these guys. They actually travel with the Circus a real circus. They travel all around the world and next month they will be in Australia. So I was super curious as to what they do in the circus, they are acrobats, (that explains the very toned arms) I was like "WOW" no way would I be able to do that. For starters I am totally afraid of heights and second totally out of shape. LOL). But he preceded to tell me that this is how is wife got back into shape after having their children. So I would be able to do it to, not a problem. "RIGHT"!!
Did you know that you can go to schooling to become a acrobat, I did not know that until I was researching this. But people actually go to school to be able to join the circus. I have a different outlook on circus people. I no longer will class them with your local fair slash parking lot carnies.
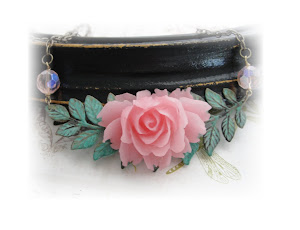
So I have come up with some inspiration for some new jewelry that I am going to make. Revolving all around the carnival but still keeping it romantic/vintage. Enjoy the pictures that have given me some inspiration. And as I finish my line of romantic carnival pieces I will list them for you to see.
(This picture was taken from nancyliuchin.blogspot.com, I just love all the colors and pieces that I really did not have to look around for anymore inspiration.)
Enjoy and I hope to have my new pieces up soon!!